Engine Output
Engine Output sends the mesh or rigged character wired into it to an open Unity project. Choose the project in Destination and click Send to Unity. Sending again refreshes the same assets, including after you move or rename their folder.
Every send includes a portable .ta backup with the graph, imported models, library animation
sources and images. A bridge supporting project sync can list your Forge projects and request an
Engine Output from a project you have not opened. Forge cooks it in the background and keeps your
current project and undo history. If an original source needs file access, Forge shows an
Allow source access prompt and Unity waits; Cancel sync ends that request. Project sync
turns on the first time this browser connects to Unity through a Destination; before that, Forge
does not look for Unity until you show a Destination.
Unity Engine Output defaults to Keep file hierarchy off: imported faces become one mesh at the file origin, with one submesh per distinct material look. Materials that differ only by name merge and take the asset name. Turn the checkbox on to preserve imported parts and material names. Imported pass-through animations, skins, morphs, cameras and lights are dropped when flattening, with a warning; Forge rigs and clips keep their existing export. Export and Unreal output keep the imported hierarchy.
Inputs
Section titled “Inputs”The mesh or rigged character to send to Unity.
Parameters
Section titled “Parameters”| Parameter | What it does | Default |
|---|---|---|
Keep file hierarchy | Keep imported parts and materials. Off flattens to one mesh and merges identical materials. | Off |
Destination | The open Unity project to send to, saved by project identity rather than port. | Set in the panel |
Folder | Folder under Assets/Forge. Blank uses the Forge project name. | Blank |
Asset name | Prefab name. Blank uses the wired node's name. | Blank |
Send to Unity
Section titled “Send to Unity”- Open Unity 6000.0 or newer with Forge Bridge for Unity installed (see Getting the package; Engine Output can install it for you). Window ▸ Forge shows the listening port.
- Add Engine Output at the end of your mesh chain. For a character, put it after Auto Rig → Add Animation (and Hair Physics when used).
- Select the node. Answer Unity’s Allow Forge to connect? dialog. Chrome may also ask whether Forge may reach apps on this device; choose Allow.
- Pick the Unity project in Destination. Multiple open projects appear by name. A saved project that is closed says not running.
- Leave Folder blank to use the Forge project name and Asset name blank to use the wired node’s label, or type your own names.
- Click Send to Unity. The status shows the prefab path or the reason a send failed.
Unity creates Assets/Forge/<Folder>/<Name>.prefab, with Meshes, Materials and Textures beside it.
Rigged characters also have Animations containing the clips and an Animator Controller. Drag the
prefab into a scene and press Play: the first clip plays. The avatar is Generic. URP, HDRP and
Built-in use their stock material shaders.
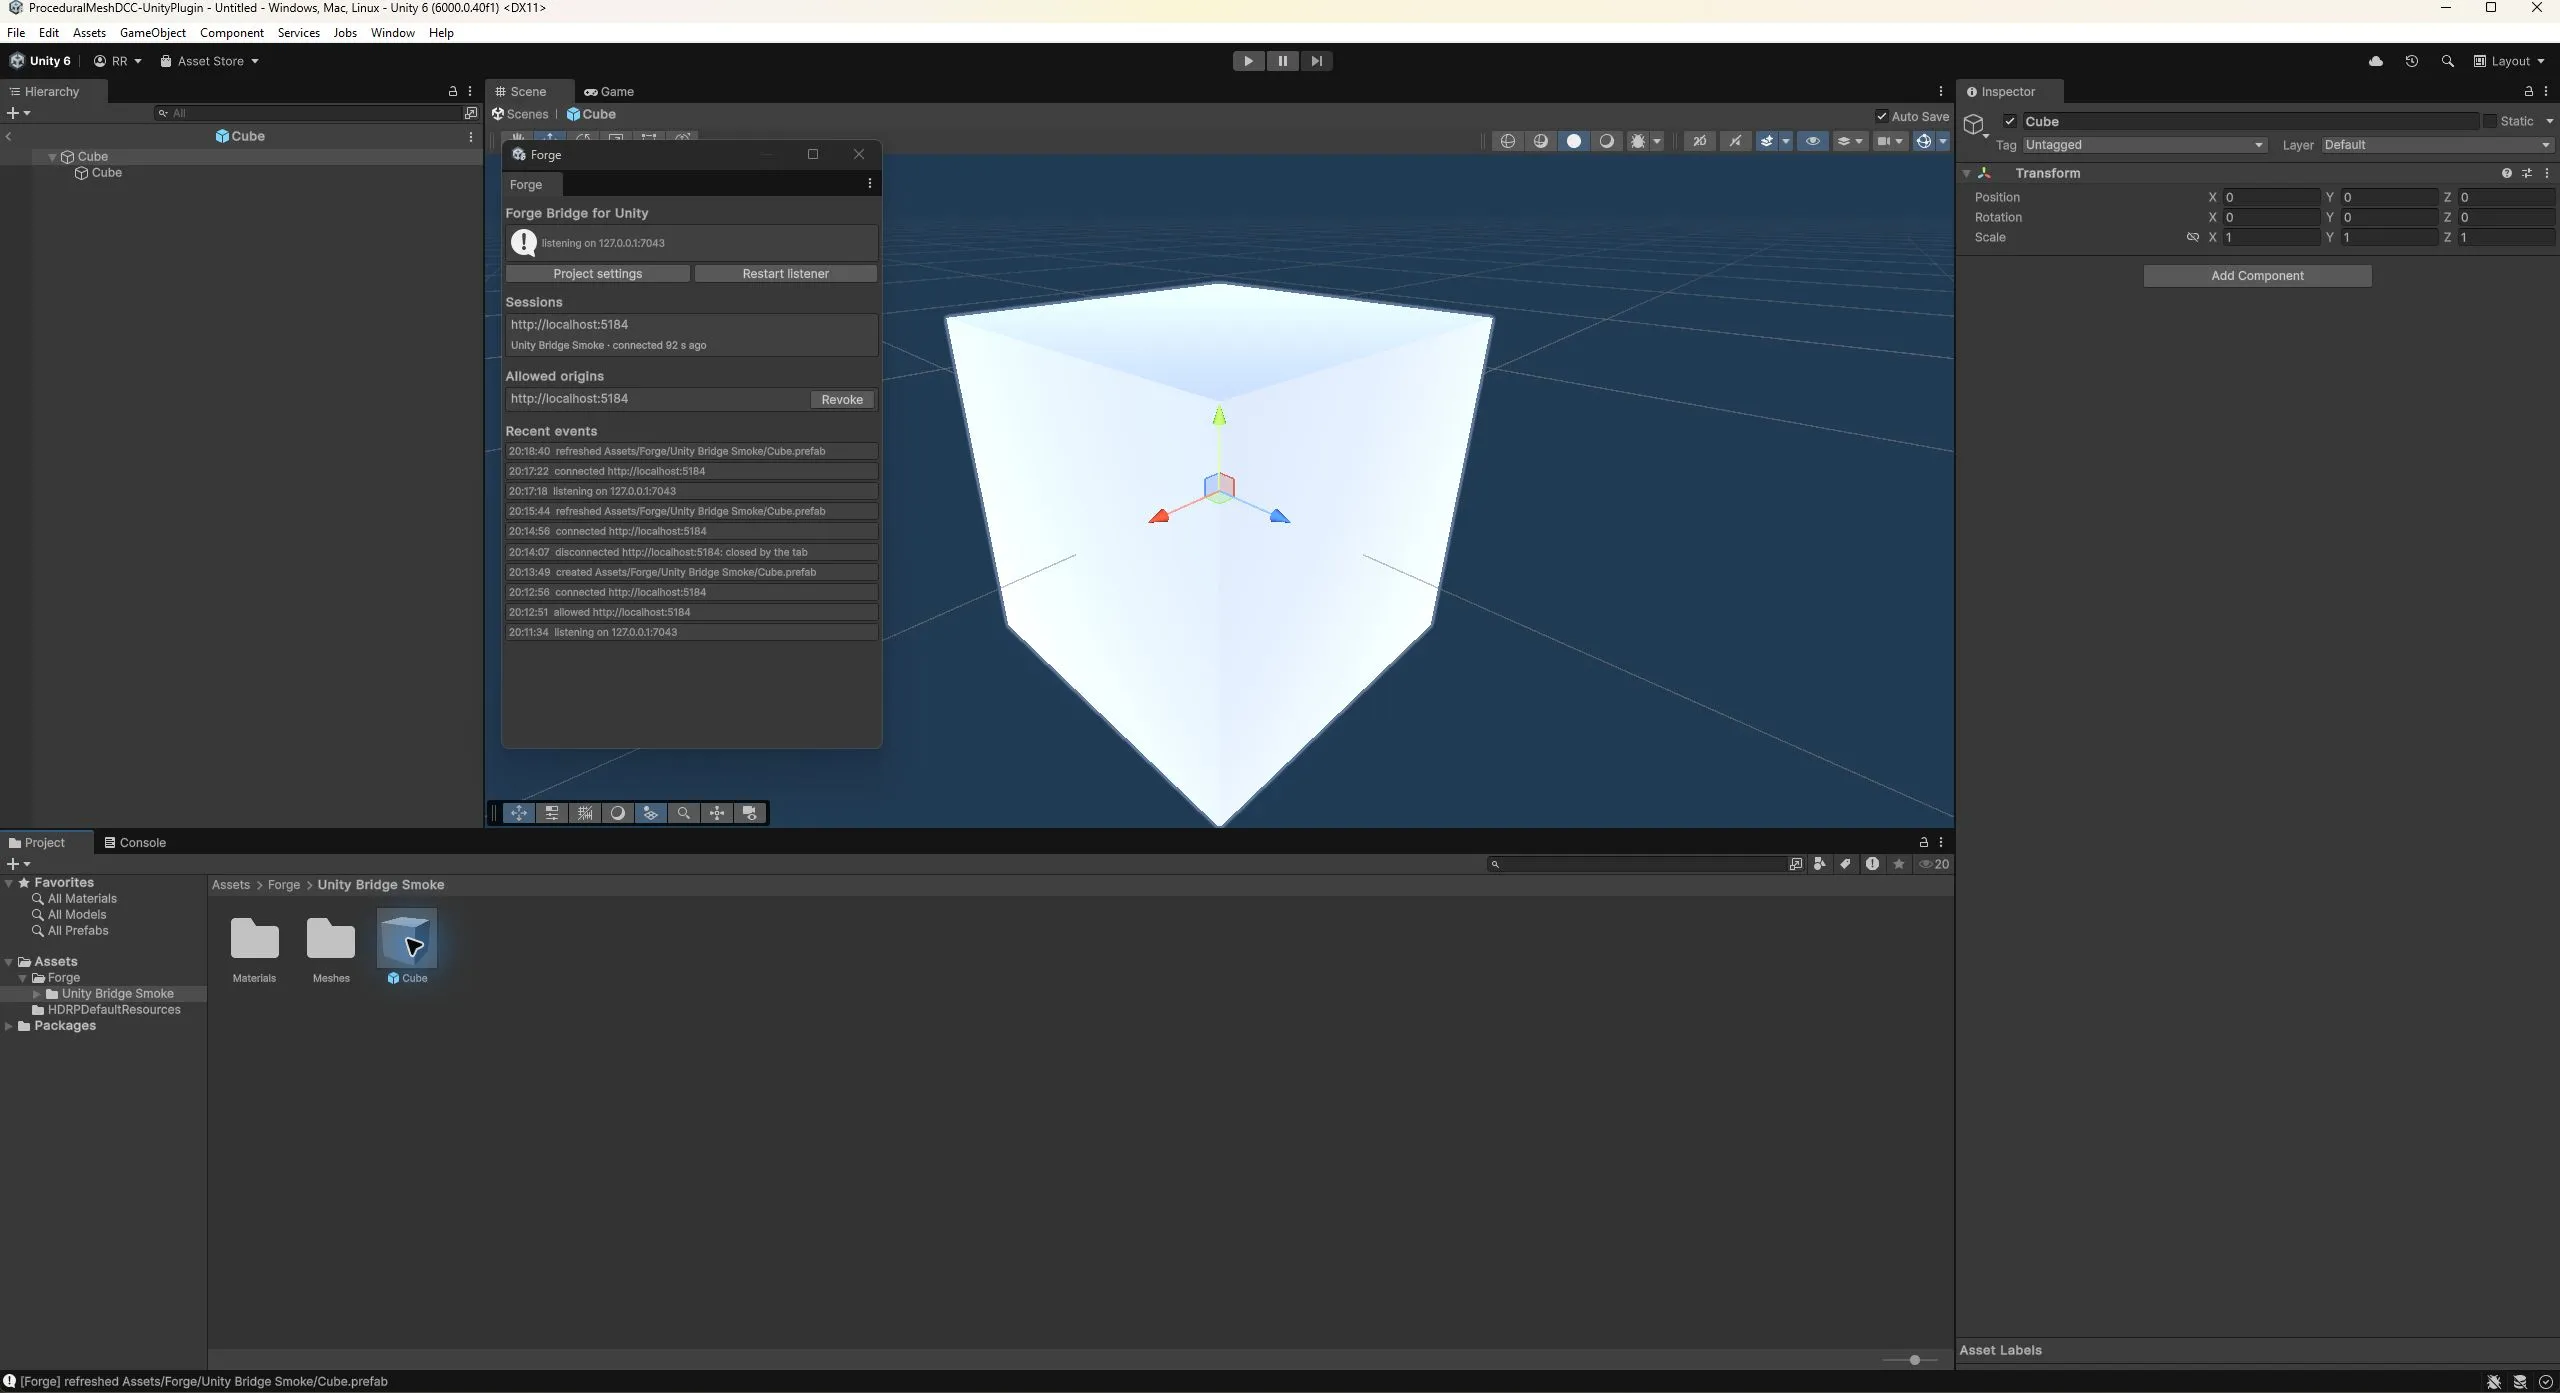
Local development smoke test in Unity 6000.0.40f1 with the Built-in renderer. A localhost Forge tab created the prefab, refreshed the same assets, and reconnected after a script reload.
Refresh and customize
Section titled “Refresh and customize”Repeat sends update Forge-owned assets in place with stable GUIDs, even after moving the folder. Customize through Prefab Variants or scene overrides. Reassigned slot materials remain yours. The Animator Controller is created once; later sends add new states while keeping your transitions and settings. An asset belonging to another Forge project cannot be overwritten.
If you click Deny, Unity refuses Forge without asking again until Unity restarts, or until you clear the entry under Denied origins in Window ▸ Forge and select the node again. After a Revoke, select the node again to be asked once more. While Unity is still importing or reloading scripts, Forge keeps checking and connects once Unity is ready. If Chrome blocks the connection, allow Apps on device in this site’s settings. Discovery scans ports 7042 to 7049; keep Unity’s configured listener range within those ports.
The node works inside subnets. The copilot can add and wire it and set Folder and Asset name;
choosing Destination and sending are actions you perform. Engine Output currently lists Unity.
Unreal Engine Output remains the Unreal node, while
Export writes a .glb file for any engine.
Getting the package
Section titled “Getting the package”Forge Bridge for Unity is free and open source (MIT) in the ForgeUnityBridge repository. It requires Unity 6000.0 or newer, and Unity fetches it with Git, so Git must be installed.
From Forge (Chrome or Edge): select the Engine Output node and click
Install into a Unity project…. Pick your Unity project folder, the one containing Assets,
Packages and ProjectSettings, and allow Forge to edit it. Forge adds the package to
Packages/manifest.json and changes nothing else. Open or switch to the project in Unity and wait
for it to install the package and glTFast; Window ▸ Forge then shows the listening port. Unity
stays quiet until Forge connects: come back to Forge, answer Unity’s
Allow Forge to connect? dialog, and pick the project in Destination.
If you pick the wrong folder, Forge says what is wrong and writes nothing. For example, you may
have picked Assets instead of the project, a folder that only contains a project, or a project
older than Unity 6. A project on an older Forge Bridge release is updated to the current one; one that installs the
package some other way (for example from a local folder) is left as it is.
By hand (any browser): in Unity’s Package Manager, choose + ▸ Add package from git URL and paste:
https://github.com/TechnicallyArtist/ForgeUnityBridge.git?path=Packages/com.technicallyartist.forge-bridge#0.2.1For local development, choose Add package from disk and select
Packages/com.technicallyartist.forge-bridge/package.json in your checkout.
Updating the bridge
Section titled “Updating the bridge”Forge shows an Update / Later prompt when it finds an older bridge, including bridges too old to connect. Later silences that version for that project in this browser. Destination keeps Update available so you can return to it.
For older bridges, Update asks you to pick the Unity project folder and updates its package pin. From bridge 0.2.1, official Git installs support one-click updates inside Unity. Switch to Unity while it resolves the package; Forge confirms the version after the editor reconnects. Exit Play Mode or wait for importing/compiling before retrying a busy editor. If Unity does not return within two minutes, check its Console. Local, embedded, and fork installs stay under your control and are never overwritten by this update flow.